How to Make Pine Needle Oil

I get a lot of questions about the pine needle salve I make, and people want to know – how do you make pine needle oil?

Well, it’s really easy!

Look at that awesome green colour!

Why the interest in pine needles? Well, pine needles have antioxidant and antimicrobial properties. They are excellent for respiratory health, and they smell really nice! Pine and other evergreen aromas are really popular in the winter months, and that’s often when we need the extra support that these conifers offer us.

What You Need to Make Pine Needle Oil:

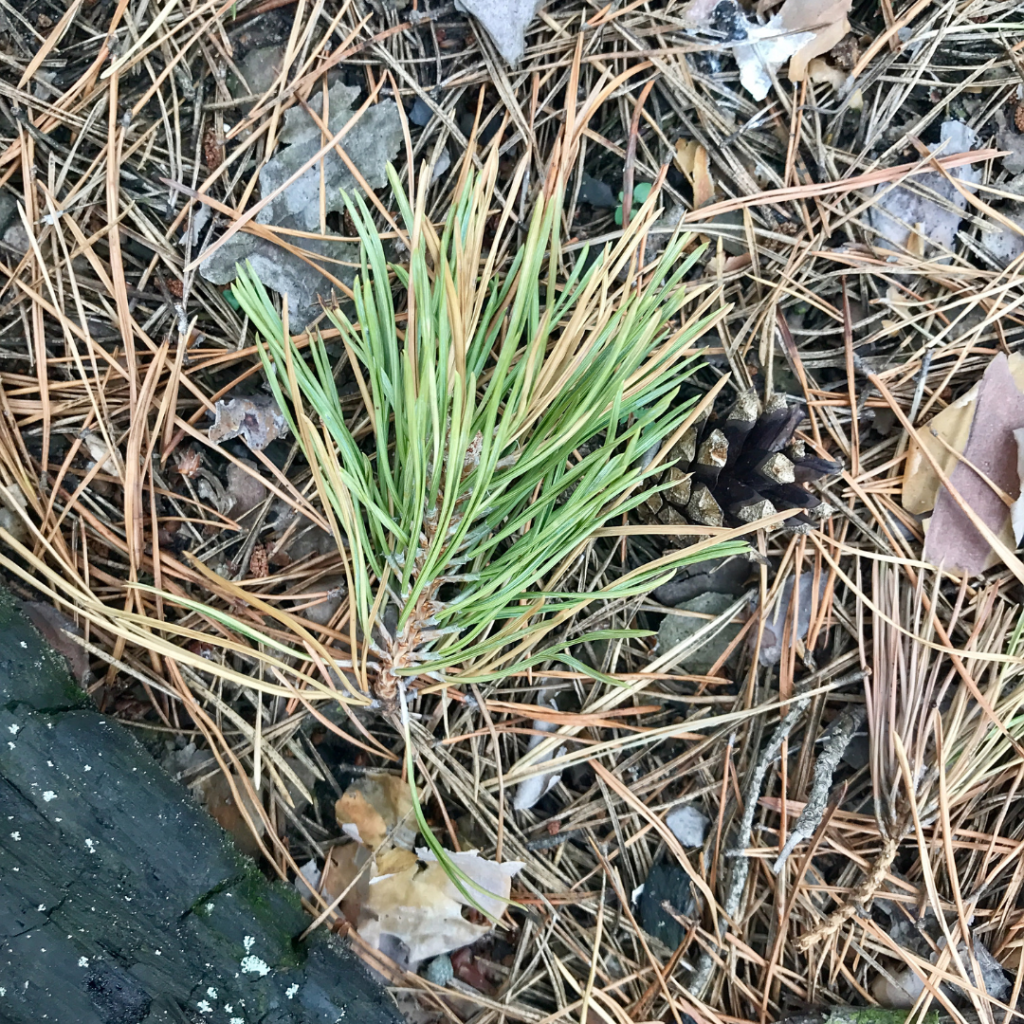
Fresh pine needles (forage responsibly)

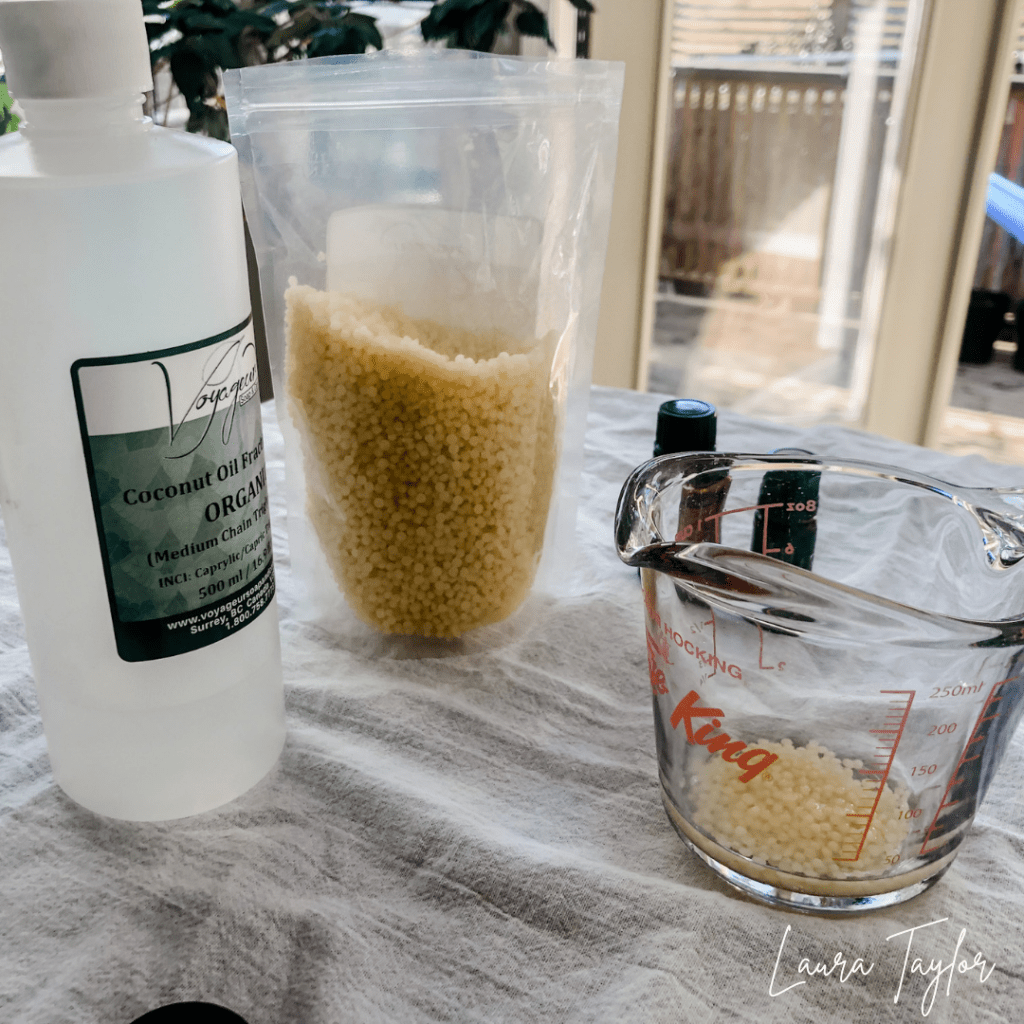
A carrier oil – fractionated coconut oil, jojoba oil, olive oil – your choice!

A clean, sanitized jar with a lid

Keeping it Clean:

Typically, when you make a herbal infusion, you want to use dried plant matter. Using fresh or wet plant products will potentially introduce water into your oil infusion, and this will lead to spoilage, mold, or a ruined infusion. Yuck! Dried pine needles can be used, but they don’t carry the same aromatic strength that fresh needles do. There are some things that you can do to use fresh pine needles without the risk of spoiling your oil:

  • Allow your pine needles to air dry before using, or harvest them on a dry day when there has been no rain or humidity.
  • Sterilize the jar you will be using, and make sure there are no water droplets in the jar. Ensure all of the utensils you will use are clean and dry (including your hands).
  • When you seal the jar after making your pine needle oil, place a piece of waxed paper or parchment between the jar and the lid. This will prevent any residue from the lid from getting into the mixture.
Fresh vs. dried – pine needle oil works best with fresh pine.

Okay, Let’s Get Making This:

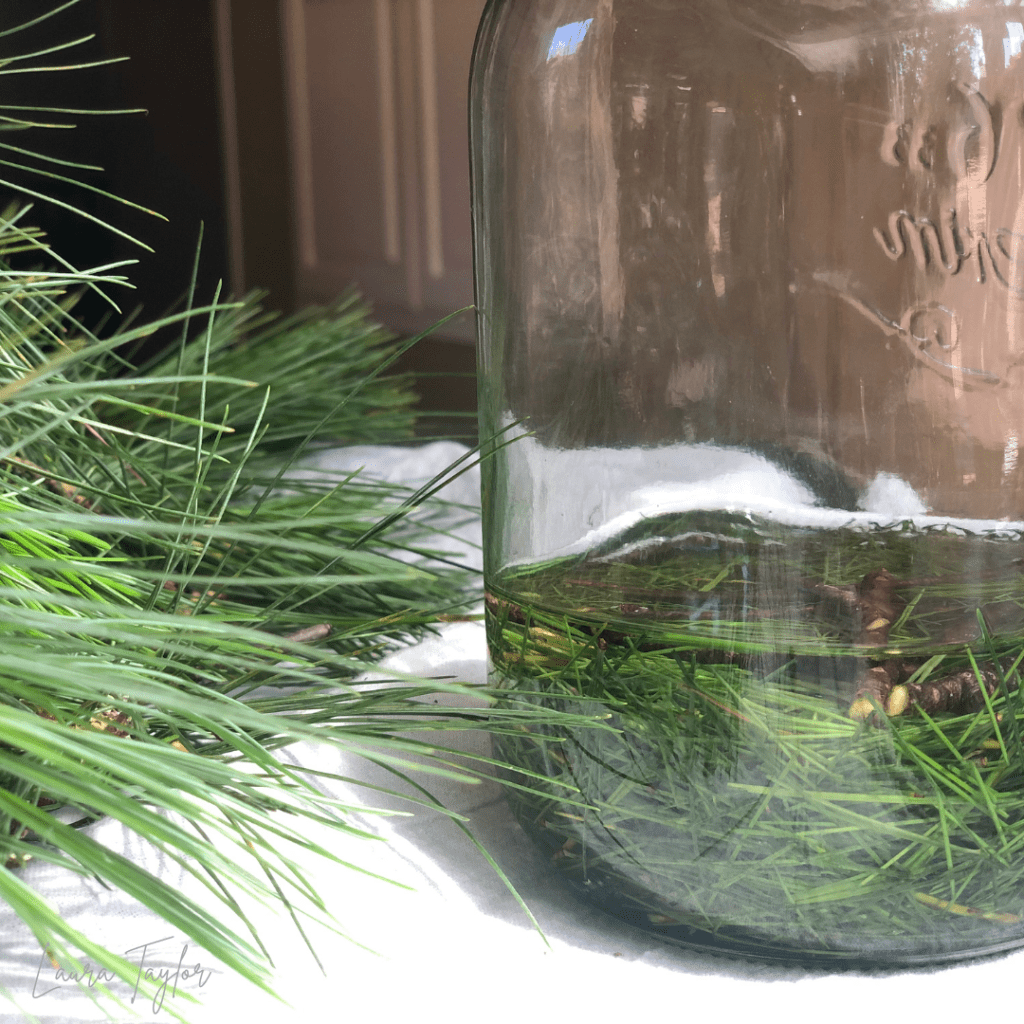
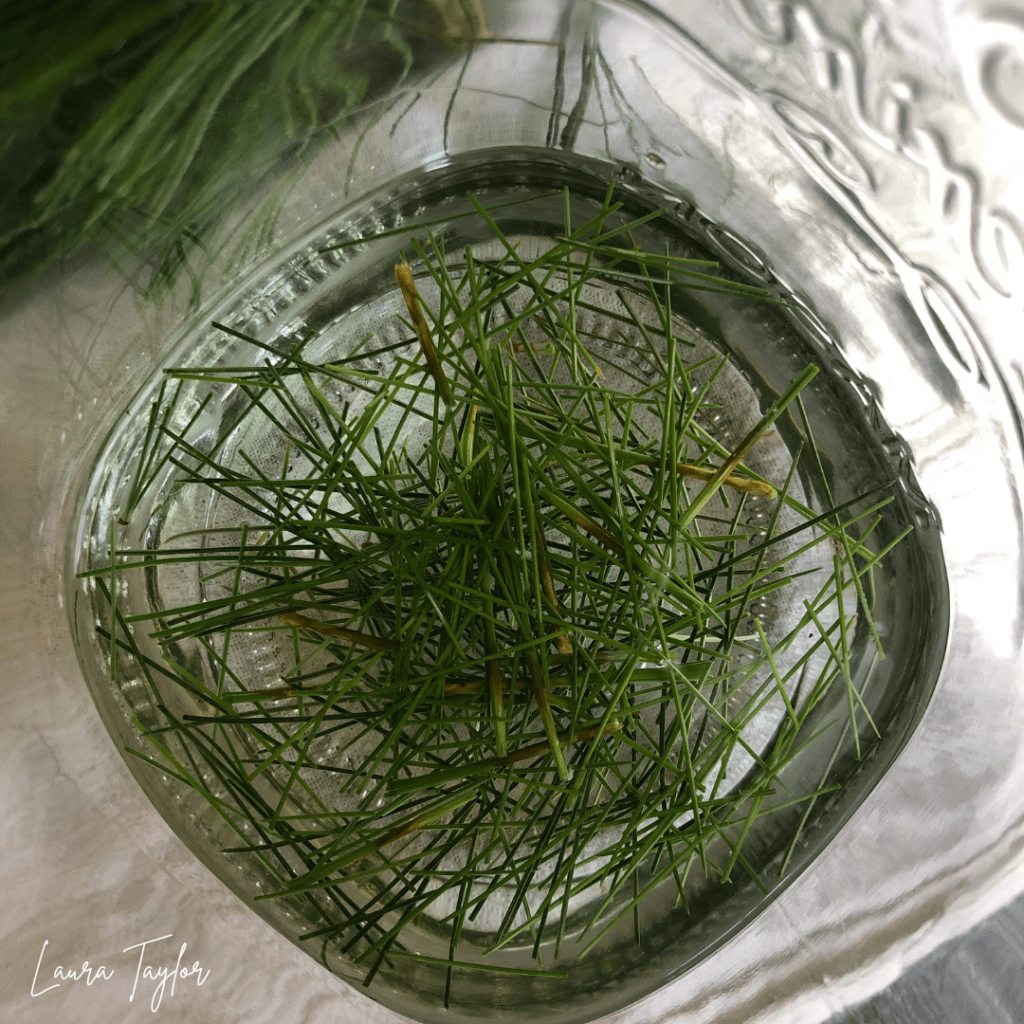
  1. Grind up your needles with a mortar and pestle, or use scissors to cut them up a bit. You’re going to release some of the natural oils this way. Put the needles into a clean, dry jar (remember that you don’t want any water in there).
  2. Pour your carrier oil over top of the needles, and make sure that the oil covers the needles completely, with some extra space. Use a dry spoon or a chopstick to push the needles down and make sure there are no air bubbles.
  3. Seal your jar up! Give it a little shaky shake.
  4. Place your jar in a dark, warm spot – away from direct sunlight. Your goal is to let the oil infuse for 4-6 weeks. Every few days, visit your jar, pick it up, swirl it around, and set it back in its spot.
  5. After 4-6 weeks, put a fine-mesh strainer in a big bowl and line the strainer with cheesecloth if you have it. Pour the oil (the needles will come, too) into the strainer. Press the needles with a spoon to get all of the oil out, or gather up the corners of the cheesecloth and squeeze any oil out. Get every last drop of piney goodness!
  6. Pour your pine needle oil into a clean glass jar, take a whiff of your delicious creation, and cap it tightly. Store your oil like you would any other oil. The shelf life of your pine needle oil is equal to the shelf life of the oil used.

Ways to Use Pine Needle Oil:

  • As a nourishing body oil for dry winter skin.
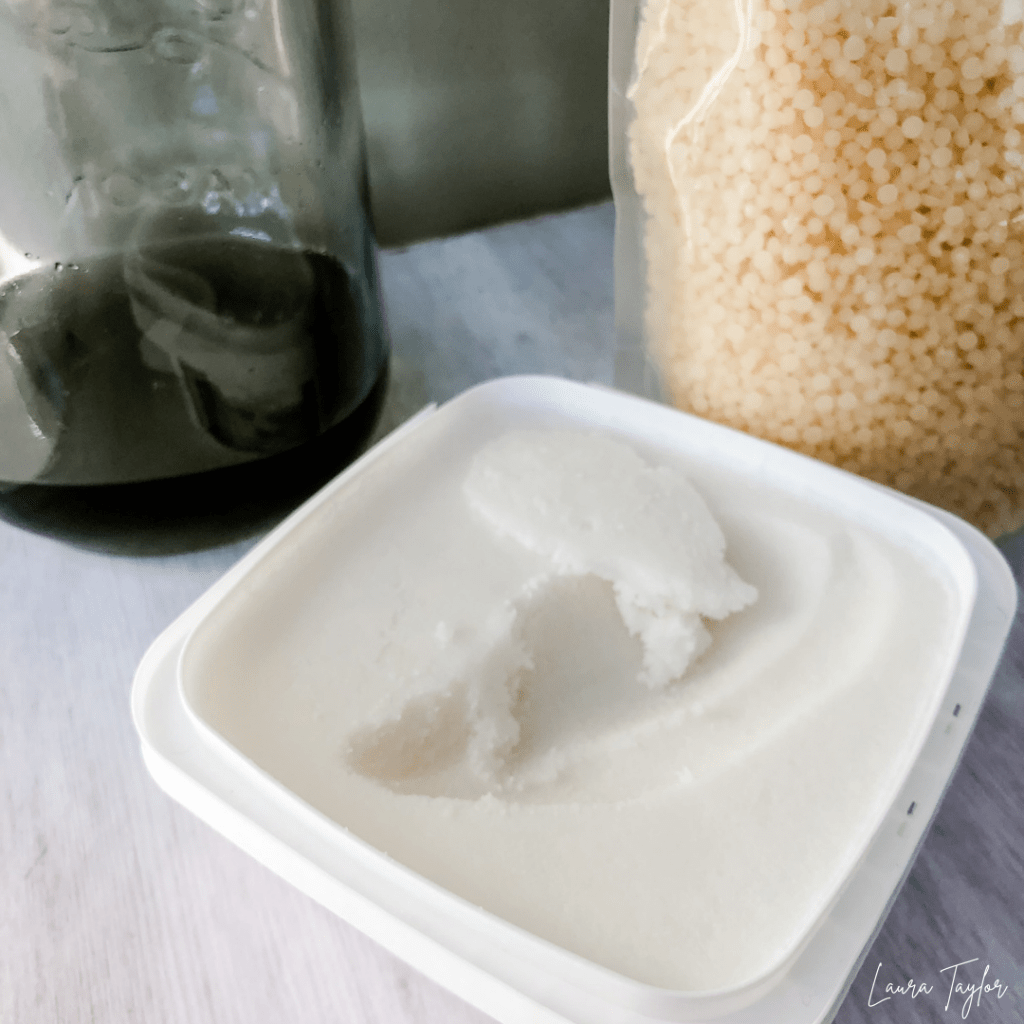
  • Make a wintery body scrub by combining with sugar.
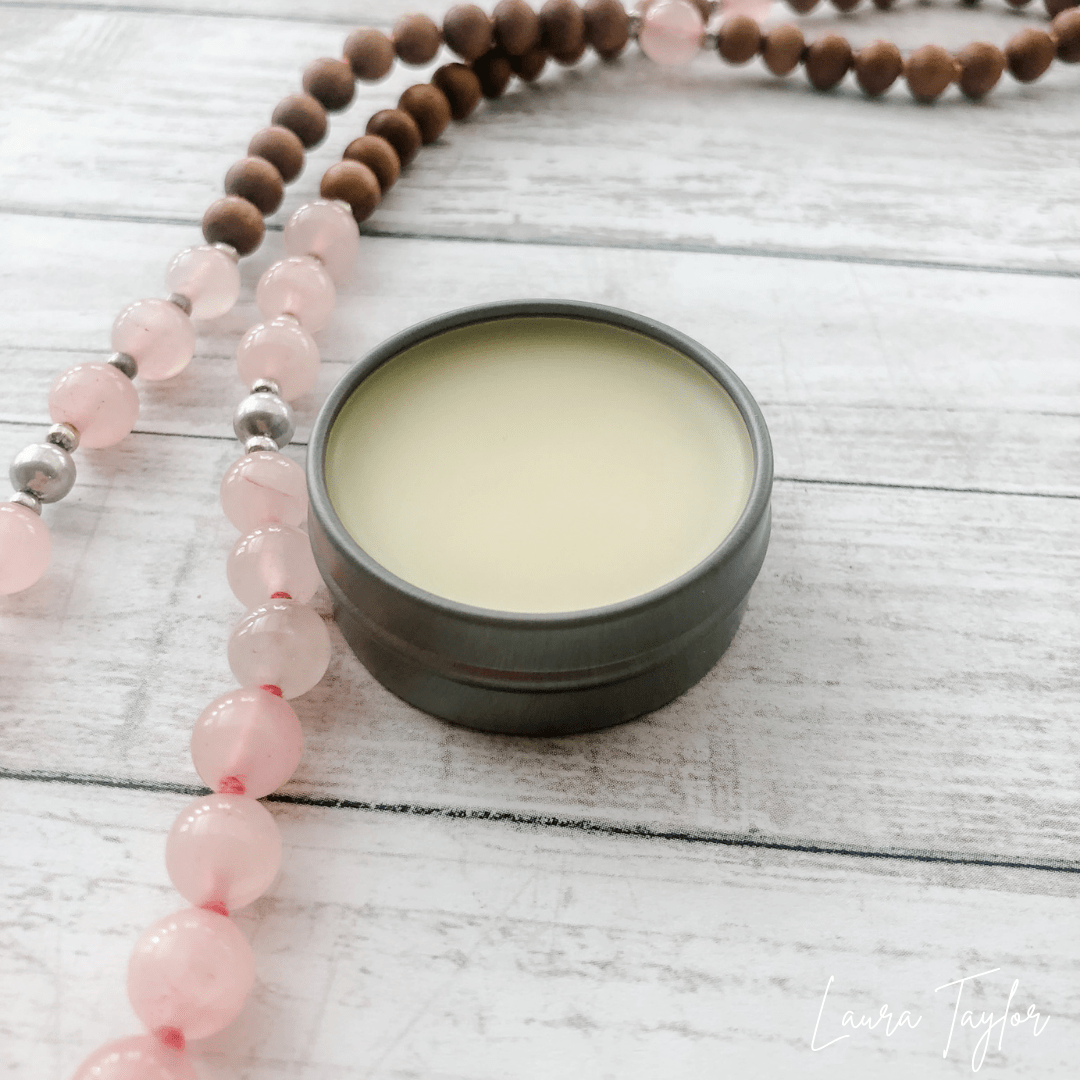
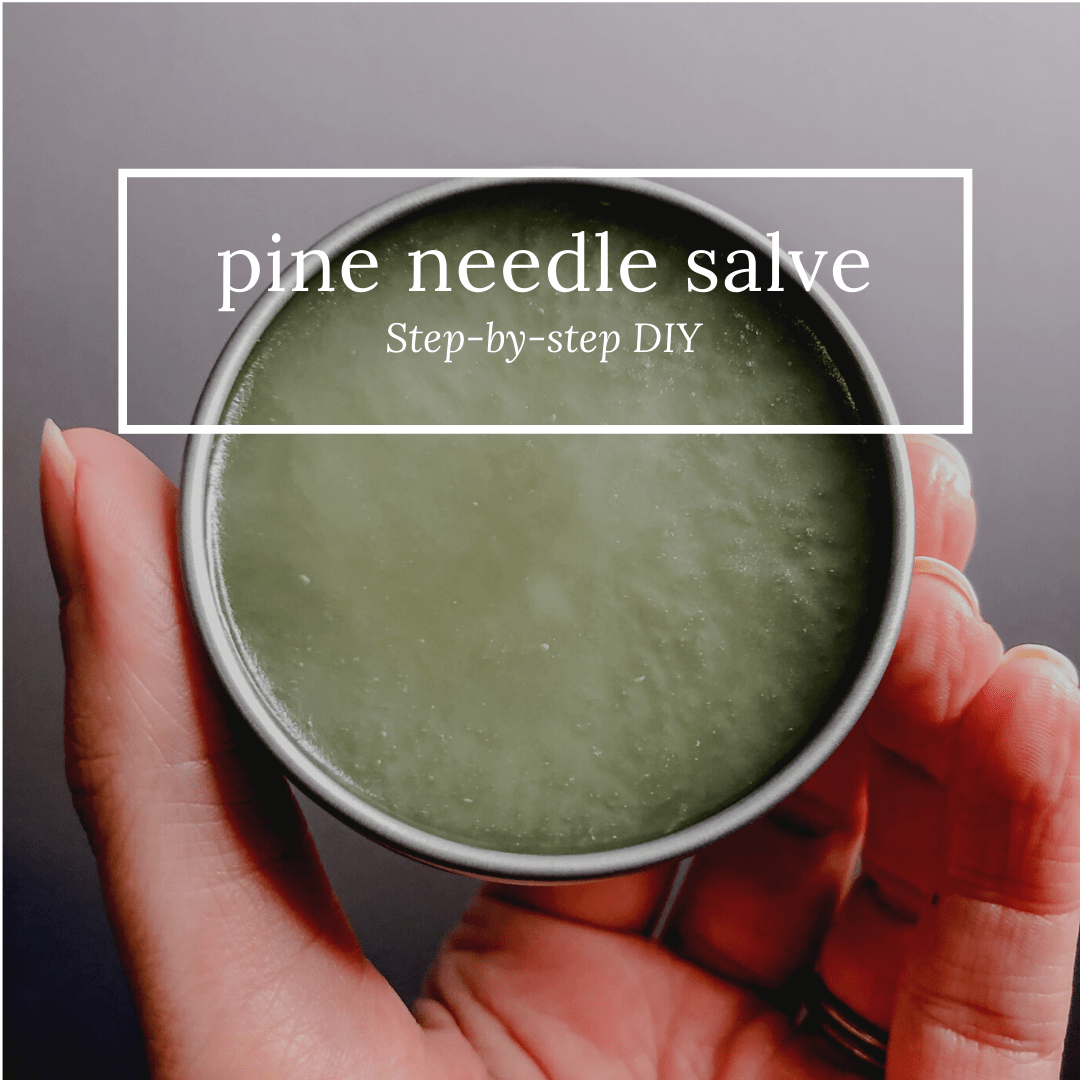
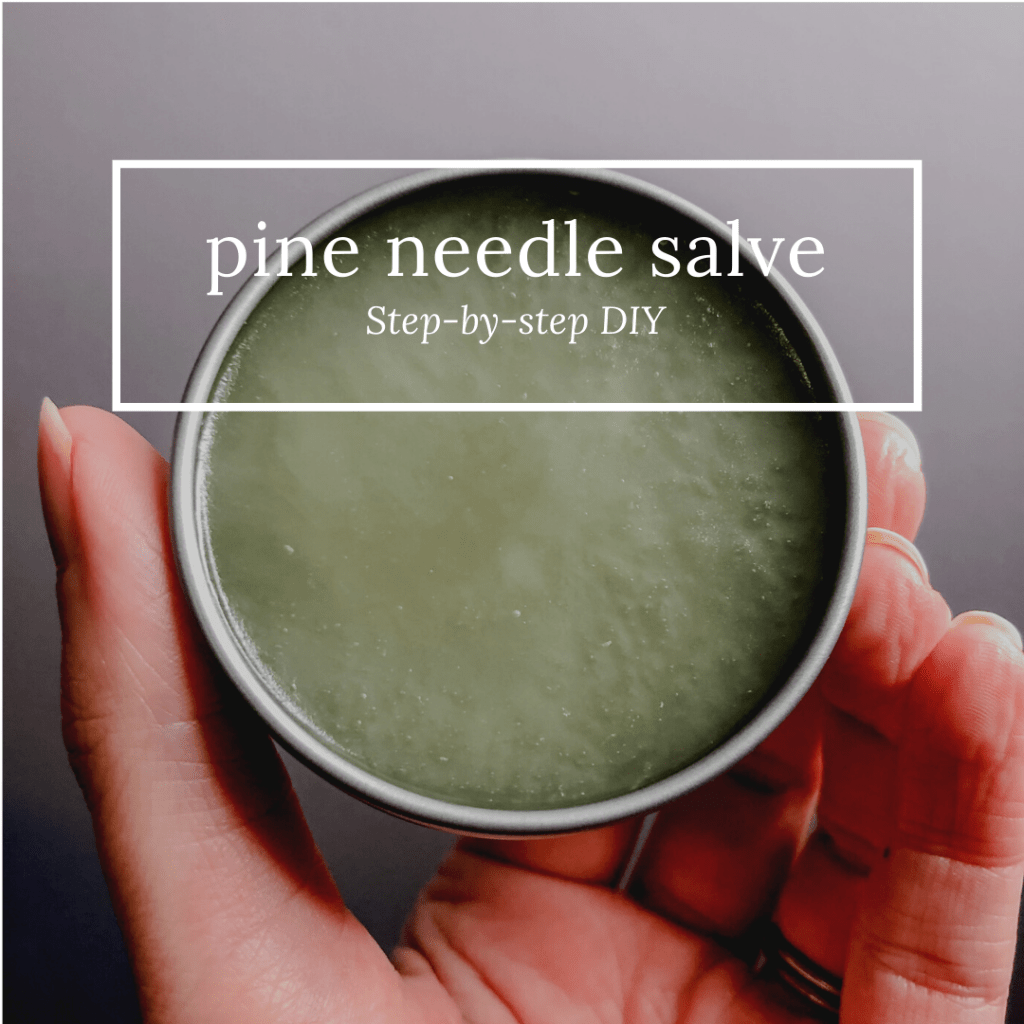
  • Create a salve, see my Pine Needle Salve recipe here.
  • Use as a base for an essential oil roller bottle. This would make a great respiratory support roller with Eucalyptus and Peppermint.

My Summer Emergency Kit

My essential oil loving friends want to know the recipes for the rollers in my adorable little emergency kit, so here they are: and check out this cute bag!

This little canvas pouch was a sweet Amazon find.

I’m kind of a grab-and-go park mom in the summer. I have a backpack that I throw some snacks and water bottles into. My little emergency kit stays in there, and I add towels or sidewalk chalk, or whatever else applies to the place we are visiting.

This little emergency kit has come in VERY handy. Here’s what’s in it:

On Guard Hand Sanitizing Spray & Wipes

I don’t like hand sanitizer because I don’t like the ingredients in hand sanitizer. I use On Guard sanitizing spray and wipes because they clean surfaces and tiny hands in a gentle, natural way. I keep these on me just in case, but I’m a big fan of letting kids get dirty and build up their microbiomes. If they pick up slugs or drop something on a bathroom floor – it’s On Guard for the win, though.

TerraShield Bug Repellent

We like to get out into nature. TerraShield is a completely natural bug repellent that is so safe for kids and pets, you can spray it right on them (and I do). It blends essential oils known for deterring all kinds of pests: Lemongrass, Thyme, Cedarwood, Geranium, and Peppermint in a Sesame Seed oil base. I went camping and slept in a tent with no door (that’s another story) and got zero bug bites … thanks to TerraShield!

Bandaids

Every first aid kit needs bandaids, and I am known for always having bandaids. I can’t even tell you how many scraped knees I have patched up already. Be the mom with the bandaids – you’ll come in handy at the park.

Correct-X

I use Correct-X on any owie, and before I put a bandaid on anyone. Correct-X is a natural version of your popular antibiotic ointment, but with no petroleum or ingredients I don’t like. Plus it has the benefit of all of those skin-nourishing essential oils. Correct-X helps scraped knees heal beautifully!

Lavender Roller

Sunburns, bee stings, bug bites, heightened emotions – I find Lavender is super helpful to have. This roller is diluted so everyone can use it.

ZenGest Roller

Known as the Digestive blend, this roller will come in handy when you have any kind of gastro issue.

Tea Tree Roller

Tea Tree is antiseptic, antibacterial, and antifungal. I use it the most when we are hanging out at the pool, and it gets rolled on the bottoms of feet and on toenails, to avoid picking anything up. If I need to clean a cut or a scrape, I use Tea Tree because it doesn’t feel hot on the skin like On Guard can.

Rescuer Roller

Sore muscles after lots of playtime are soothed by the Rescuer roller, as are growing pains, sore feet, and little headaches. This roller is a blend of Copaiba, Lavender, Spearmint, and Zanthoxylum – and it is great on tired little legs from all that adventuring.

Owie Spray / Skincare Roller

This might be my best essential oil blend EVER. The ability of these oils to work synergistically to support healthy, healing skin is incredible. I like my Owie blend in a spray so I’m not rolling it over broken skin. If you only have roller bottles I would roll the blend onto clean fingers and apply from there.

Here’s the recipe for a 10mL bottle:

  • 10 drops Frankincense (skin support)
  • 5 drops Lavender (soothing, calming to skin)
  • 5 drops Tea Tree (antiseptic, great cleanser)
  • 5 drops Helichrysum (slows bleeding, supports tissue repair)
  • Top with carrier oil of your choice

Bug Bite Roller

It doesn’t happen often, but sometimes bug bites or bee stings happen and I love this blend for soothing sore, itchy skin. I made this one in a 5mL bottle because I don’t use a lot of it, but I’m sure happy I have it when I need it! Look at that beautiful blue colour!

I’m running low with this blend!

Here’s the recipe for a 5mL bottle:

  • 5 drops Lavender (soothes agitated skin)
  • 5 drops Tea Tree (antiseptic and cleansing)
  • 5 drops Peppermint (cools hot skin down, takes the sting out)
  • 2 drops doTERRA Purify blend (very cleansing to skin)
  • 1 drop Blue Tansy (soothing, anti-inflammatory)

The mini first aid kit bags fit everything perfectly and you can find a link to them right here on Amazon. They come as a pack of four, so I suggest making a kit for a friend, or hosting an essential oil Make and Take with them.

I am a doTERRA rep based out of Vancouver, BC. All of the items above can be viewed or purchased through this link: Summer Essentials Oil Kit. Becoming a regular customer with me saves you 25% off your purchases.

I do earn a commission with each purchase, and I do a little happy dance when I see each and every order. Thank you for reading my content and supporting my business!

How I Grew My Hair Post-‘Rona

Soooo I had the ‘Cron and it was no big deal. I am, however, a little bit worried about hair loss post-infection, after reading stories of so many women experiencing it. My hair is already fine and thin to begin with and if I were to quickly lose a bunch of it, I would be sad.

Hair shedding is common after a viral infection, and usually occurs in the months after an infection (just when you thought you were done with all the bs). Stress and other health factors can lead to hair shedding as well.

I decided to get proactive. I researched and implemented a few ideas, noticed my hair growing super fast, and now I’m sharing them with you!

2 DIYs and 2 store-bought products made noticeable difference … let’s dive in.

Hair Growth DIY Spray

You know I love my essential oils and I have a whole arsenal to play with. Many essential oils are great at promoting hair growth, hair strength, and a healthy scalp. Rosemary in particular stimulates circulation around the hair follicles, almost like waking them up and telling them to go to work! A pretty bottle, and a few drops of plant magic, and I had myself a DIY hair growth spray.

Here’s what went down:

Ingredients

  • 1/2 teaspoon carrier oil (like jojoba oil)
  • 1.5 tablespoons alcohol-free witch hazel
  • Distilled water (or tap water, it’s fine)
  • 5 drops Peppermint essential oil
  • 5 drops Rosemary essential oil
  • 5 drops Lavender essential oil
  • 5 drops Cedarwood essential oil

Instructions

  1. Add witch hazel and carrier oil to 2-ounce spray bottle.
  2. Add essential oils to the bottle.
  3. Top up with water, leave a bit of space to get that spray top in!
  4. To use: shake well before use. Spray onto hair at the roots and brush through daily. I love using this when my hair is damp after a shower.

Hair Growth Scalp Serum DIY

The right hair growth serum will contain ingredients that moisturize the scalp and increase circulation. A scalp in good, healthy condition will encourage the follicles to grow strong, healthy hair, at a faster rate. For my DIY hair growth serum, I took the best oils for hair, and put them together in one amazing little pump bottle.

Ingredients

  • 1/4 cup carrier oil (jojoba or castor oil are great for this).
  • 5 drops Peppermint Essential Oil
  • 3 drops Rosemary Essential Oil
  • 3 drops Tea Tree Essential Oil
  • 3 drops Thyme Essential Oil
  • 3 drops Cedarwood Essential Oil
  • 3 drops Lavender Essential Oil

Instructions

  1. Add essential oils to a pump top, or a dropper top glass bottle (I use a 2oz bottle for this recipe).
  2. Add your desired carrier oil. Swirl to combine.
  3. To use, place several drops of hair growth oil on fingertips and rub your fingers together to evenly distribute. Massage scalp with fingers, starting at the front hairline and finishing at the base of the neck.
  4. Allow the oils to absorb for about 20 minutes before washing hair, or leave overnight and wash hair in the morning. If I’m going to wear a toque all day (so Canadian of me) I’ll let this serum stay on all day.

WE NEED TO TALK ABOUT COLLAGEN

If you want to grow your hair, the first thing you want to get is a collagen supplement. The amino acids in collagen build hair proteins and strengthen the skin that contains your hair roots. Collagen encourages growth and sets a strong foundation. I am sure that my daily collagen habit led to noticeable hair growth.

You can buy collagen in liquid, powder, or capsule form. I prefer the powder and I toss a scoop into my morning coffee (it dissolves and has no taste), or in a smoothie. I haven’t tried a liquid collagen yet, and the only reason I didn’t do capsules is because I already take a bunch of supplements.

I’m not loyal to any particular brand of collagen but these are my two favourites:

Vital Proteins Marine Collagen

Organika Marine Collagen 

I do want to try a liquid collagen, as I have heard the liquid form is more bioavailable to you. If you have a recommendation for a good one that is unflavored and can go in my coffee – let me know!

There’s a 100% chance I’m having coffee in the morning, so this is an easy addition to an established routine!

BIOTIN

Biotin (AKA vitamin B7) stimulates keratin production in hair, which can increase the rate of follicle growth. Biotin plays a key role in hair, skin, and nail health. I went on the hunt for a badass biotin supplement.

I settled on Biotin Beauty Gummies from HerbaLand. They are sugar free, vegan, non-GMO, and made with ingredients that made me happy. I love that they are a local company to me, and they taste great.

Update: guys, I am in LOVE with the Herbaland gummies! I am on my 4th bottle and I have no plans to stop. Out of the biotin gummies I compared, the Herbaland ones contained the most biotin (2500mcg per gummy).

Not bangs – it’s new hair growth!

I’ve been doing these things for a few months now, and I have a lot of new hair growth. There is a definite crown of baby hairs on my head that makes styling difficult, but I’m just really happy to see all the new growth happening.

Give these a try!

Disclosure: I may make a small commission when you purchase items linked in my blog! I always make sure to link products that I personally use and love.

How To Make Solid Perfume

By now, you probably know that I haven’t used a store-bought perfume in years, and I have been a walking cloud of essential oils instead.

I like using essential oils as perfume because they are completely natural and they don’t come with the skin irritating, lung harming, endocrine system disrupting side effects that your department store perfume does (yeah I said it).

I love my essential oil roller bottle perfumes, and I make cute spray bottle perfumes, as well. I’m always worried that they will leak or spill in my purse when I’m out and about, though. I wondered if I could get the same level of fragrance from a solid perfume.

Think I did it?

This little tin is going to hold all the smelly goodness in a few minutes.

I guess I better tell you how to accomplish this tiny tin of heavenly aroma. All you need are THREE ingredients:

BEESWAX: this makes your perfume solid! Beeswax is gentle on your skin, keeps skin hydrated, and absorbs nicely. If you are looking for a vegan-friendly ingredient, try candelilla wax. I find candelilla wax is a bit harder than beeswax, so adding some extra coconut oil will improve the consistency for you.

FRACTIONATED COCONUT OIL: one of the most popular carrier oils. If you’re an essential oil lover, you likely have this on hand. Fractionated coconut oil is clear and odorless so it won’t stain or interfere with the aromatic profile you’re going for.

ESSENTIAL OILS: The most important ingredient of a perfume! When you want to create an authentic, natural aroma – essential oils are what you turn to. Certain oils pair nicely together, I have listed some of my favourites below. I use doTERRA oils because of the chemistry analysis showing they are 100% unadulterated. This means that I need to use less drops to get the aroma I want, and they smell way better. Use my referral code to save 25% on doTERRA essential oils

Three ingredients to make solid perfume. This one I’m using a citrus floral blend (Citrus Bloom) with Sandalwood.

Perfume combinations that smell fabulous:

  • Sandalwood and Wild Orange
  • Neroli and Vanilla
  • Grapefruit, Ylang Ylang, Wild Orange
  • Patchouli and Wild Orange
  • Rose and Cedarwood

Supplies Needed:

1 tablespoon fractionated coconut oil

2.5 teaspoons beeswax

25 drops of essential oils

1oz container or tin (makes approx 1oz of solid perfume)

What Went Down:

  1. Choose 3 or 4 essential oils for your perfume, try to use a top note, a middle note, and a base note (see below).
  2. Put the beeswax into a heat proof container and add the fractionated coconut oil.
  3. Heat gently until melted using a microwave or double boiler. 
  4. Remove from heat and let the oil/beeswax cool slightly. Then add your essential oil drops and stir. Do a sniff test – are you happy with it? Adjust if needed. NOTE: it will start to solidify very quickly so ensure you work fast.
  5. Pour the liquid into your container (you might need to heat gently before pouring if it has already started to solidify).
  6. Put your container in a quiet place and leave the mixture to harden. Once it’s cooled you can pop that lid on. I find it is best to leave your perfume for approximately two weeks before using to allow time for the essential oils to mature – I know, I know, you want to use it now!
Look at this beauty!

CREATING A WICKED PERFUME / BECOMING A PERFUME MASTER

A perfume has three parts: a base, a middle, and a top note. A great perfume will feature all three. Let’s break them down.

Base Note:

The base note is where you start. You really want to be in love with your base note. A base note is a fixative. It takes the chemical components of all the other oils and it grabs them and it holds onto them – like a perfume anchor. These are the oils that you smell on your skin for the longest amount of time.  

Base note essential oils: Patchouli, Sandalwood, Vetiver, Cedarwood, Frankincense, Copaiba, Jasmine, Vanilla, Ylang Ylang.

Middle Note:

The mid note is the heart of your perfume. You might one to have more than one mid note oil, and that’s totally allowed. This is the main feature of your perfume. I like my middle notes to set the vibe for my perfume. Feeling sexy? Neroli. Calm, cool, collected? Siberian Fir. Strong feminine? Rose or Geranium.

Middle note essential oils: Black Pepper, Cardamom, Fennel, Douglas Fir, Geranium, Rosemary, Marjoram, Siberian Fir, Roman Chamomile, Geranium, Lavender, Neroli, Rose.

Top Note:

Finish your perfume with a top note. The top note is what you will smell initially right when you put it on. Make a good first impression! The top note is the first thing you smell, but by nature, they flash off quickly (the smell fades fast). Then your middle note will shine through (why you need to love it), and the base note holds steady. Wow, this is complex, isn’t it?

Top note essential oils: Eucalyptus, Grapefruit, Lemon, Lemongrass, Lime, Peppermint, Spearmint, Tangerine, Bergamot, Petitgrain, Wild Orange.

That one time when I made 50 perfume bottles in one night to gift at an event. Good times!

Maybe you just want someone to tell you what essential oils to blend together? I got you, friend, check this out:

Ok, go on and make something that smells amazing, and remember to give yourself full credit when you get compliments that you smell divine!

Like my content?

Follow me here on Pinterest

Get social right here on Instagram

Pine Needle Salve

Pine Needle tea has recently emerged as one of those IYKYK remedies. Pine needles (and resin and bark) have been used for ages to support cardiovascular health and immune function.

I really love trees and natural medicine. When pine needles popped up on my radar recently, I dove into the research about them and decided that I needed a way to incorporate a little more pine into my life.

I made tea, I infused oil, and then I decided I wanted to make a salve. Something to have on hand for when a winter cough or cold was brewing, a natural way to support my littles’ respiratory and immune systems, something easy that I could make myself.

Let’s make pine needle salve!

First you need some pine needle oil. How the heck do you get that?

I live on the West Coast of Canada, and white pine trees are abundant here. I have a specific forest that I like to visit and harvest my pine needles from. Don’t take a saw to your neighbour’s trees – if you can’t gather pine needles in the proper way, you can search online and get them that way.

After you have rinsed and dried your pine needles, add 1.5 cups of a carrier oil to a mason jar. Add 1 cup of pine needles to the jar, and place the lid on. Swirl the pine needles around and place the jar in a cool place for a few weeks. When you check on your pine needle oil, move it around in the jar a little bit. I notice that my oil takes on a green hue as the pine infuses the oil. Smells really nice, too (yes I crack the lid and sniff). Wait a few weeks. Now you have pine needle oil.

Pine needle oil with a gorgeous green hue. Mine’s almost empty – gotta make more!

Ingredients:

  • 1 cup pine needle infused oil
  • 1 oz beeswax (candelilla wax for a vegan option)
  • 1 oz shea butter
  • 12-24 drops essential oil (recommendations below)

Note: you could easily cut this recipe in half to make a small batch/test batch. Full recipe makes 4 individual 2oz tins.

Pine needle oil, shea butter, and beeswax. Grab some essential oils, too.

What went down:

  1. In a double boiler, melt your pine needle oil, beeswax and shea butter together.
  2. Remove from heat, add your essential oils, and stir.
  3. Fill your containers and leave them in a quiet place to set (lids off).

You made pine needle salve! Tell a friend!

Essential Oil Combinations I Love:

  • Black Spruce + Arborvitae – a deeply woodsy 1,2 punch for the respiratory system.
  • Eucalyptus + Rosemary – smells like a spa, opens your airways, gloriously mentholy.
  • Frankincense + Lime – a very gentle congestion-soother.
  • Peppermint + Lavender – so soothing and cooling.
Check out that gorgeous green from the pine!

Like my DIYs? Give my Pinterest a follow

Wanna see what I’m up to day-to-day? Here’s my Instagram

Into my essential oil email newsletter? Join my list here

Would you like to purchase doTERRA oils? Here’s my top seller

DIY Lip Balm

This is the most simple recipe, I can’t believe I didn’t start doing this sooner.

Once upon a time I used to buy drugstore lip balm with cool flavours like root beer and questionable ingredients. Then I decided to switch to all natural brands, and would drop $5 at the organic market for a product that I knew was better for me.

But then, one day, after adding a drop of Peppermint essential oil to a tube of lip gloss and loving the cool tingly sensation – I wondered if I could make my own lip balm.

Aaaaaaaand I made my own lip balm!

Look how cute these turned out! I’m giving this batch away as gifts.

What You Need:

  • 1 tablespoon beeswax (candelilla wax if you want a vegan option)
  • 1 tablespoon cocoa butter
  • 1 tablespoon coconut oil
  • 12 drops of essential oils
  • 6 lip balm tubes or small tins
If you can boil water, you can make lip balm. You simply need the right supplies.

Make It Happen:

  1. Add the beeswax, cocoa butter, and coconut oil to a double boiler. Heat until the ingredients are melted together.
  2. Once everything is nicely melted, remove from the heat, and add your essential oils into the mixture. Stir it well, and don’t take your sweet time – your lip balm mixture will start to harden.
  3. Fill your containers. A steady hand, a tiny funnel, whatever you need to get from point A to point B. You might have to put it back on the heat if it hardens too quickly (I warned you!)
  4. Let your containers sit at room temperature for a few hours until they have cooled completely. Wait until the balms have hardened before putting your lids on. Have cats or unruly children? Cool your balms away from the chaos. Trust me.
We’re gonna melt this, and then move quickly.

Best essential oils for your lip balms?

The possibilities are endless, but just like root beer flavoured lip balm isn’t doing you any health favours … neither are crappy essential oils.

Your balm is going onto your lips, you’re going to end up licking it – please make sure you are using oils that are safe to ingest.

I have always used doTERRA essential oils for the ethical sourcing and quality testing they complete with each oil. I love them so much that I have built a business selling their essential oils. Can you buy oils through me? Of course you can, and it makes me so happy when you do!

Buy oils here

Back to the great oils for lip balms.

  • Peppermint – minty, cooling, tingly.
  • Spearmint – fresh, minty.
  • Wild Orange – warm, fruity, happy.
  • Grapefruit – fresh, citrusy.
  • Vanilla – aromatically appealing, tasty.
  • Lavender – soothing, floral, healing.

This batch I used half Peppermint, and half Madagascar Vanilla. I call it Vanillamint and it smells delicious.

This is actually a roller bottle holder for essential oils, but it makes a perfect lip balm curing station!

If you enjoy my content, I invite you to connect with me on Instagram or Pinterest – my two preferred platforms these days. If you make one of my recipes, tag me @tayloredoils.co so I can see it, cheer for you, and share it!

If you wanna get personal, subscribe to my monthly essential oil newsletter here.

Now go make some lip balm and take on the world!

How to Make Soy Candles

I love a good candle.

I think it’s the ambiance, the warmth, and that they cast a beautiful soft glow across my mid-thirties face like an Instagram filter does.

What I don’t love about candles are the ingredients of many of them on the market. I’m not into the fake fragrances and once I realized how darn EASY it was to make my own candle, well, I made my own candle.

It turned out so well, I’m sharing it with you!

Personally, the wooden wick really lights me up.

Why Use Soy?

Soy is a natural and renewable crop. Burning a soy candle will not release any nasties into the air, and there will be no soot residue to clean up. A soy candle burns slower than its paraffin or beeswax counterparts. This means the melted wax is less hot (handy for the clumsy folks) and the scent will disperse better (if you make them scented), because it doesn’t get heated off as quick. Soy candles are vegan friendly.

Why Don’t I Add Fragrance?

I like candles for the ambiance and the hygge vibe. If I was going to scent my candles, I would want to use a pure, non-synthetic smell, like essential oils. The problem I find with using essential oils in candles is that you need A LOT of essential oil, and the wax doesn’t hold the scent or disperse it that well. This can turn your DIY project into a costly experience, and if I’m being honest – I like my oils in my diffusers and not my candles.

If you need fragrance in your candles, there are fragrance calculators available online to help you get the balance right … but maybe try scent free just this once.

So here we go, let’s make a candle. I promise this is going to be ridiculously easy.

I love the easy, casual look of mason jars. Use a vessel that makes you happy.

What You Need:

  • 2 cups of soy flakes
  • One 250mL glass jar or tin container
  • Glass measuring cup
  • Candle wick
  • Chopsticks, popsicle sticks, or tape to hold the wick in place
  • Stir stick
Mason jar filled with melted wax – when it cools it will turn a soft white.

Get ‘er Done:

  1. Place measuring cup with wax in a few centimeters of boiling water to create a double boiler.
  2. When the wax is melted in the double boiler, remove from heat and use a spoon to drip a little bit of wax at the bottom of your jar or canister.  
  3. Stick the wick in place while the wax is still liquid. Hold the wick in place until the wax is cool and hardened. 
  4. Pour in the melted wax to fill your jar using 2 popsicle sticks to keep the wick in place while the wax is cooling and hardening.
  5. Wait 45 minutes for the wax to cool and harden.
  6. Once the candle is hardened, trim the wick so that it sits about a centimeter above the top of the wax.
  7. Light it up!
Ready to up the cozy factor at my house!

I source my supplies for DIYs from small, local suppliers wherever possible. For this project:

Soy wax and wooden wicks – from Voyageur Soap & Candle

Please make sure you’re burning responsibly!

Catch you later,

“Thousands of candles can be lighted from a single candle, and the life of the candle will not be shortened. Happiness never decreases by being shared.”

Buddha

Where Do I Apply Essential Oils?

Where on my body do I put essential oils, and is there any way I can screw this up?

These are common questions people ask me. And the short answers are 1) wherever you need them, and 2) not really.

X marks the spot you wanna hit up with your oils when you’re mega stressed out.

I have always been an intuitive oiler, selecting and applying my oils based on what feels right to me. But I have an appreciation for the people who want clear instructions on what exactly to do with their oils. I know – there are a LOT of oils and a LOT more uses than any of us can truly master.

Good news: there are 9 great application points on your body.

You: go choose an essential oil that makes you feel good.

I: will give you a list of places to try it out.

Where to Apply Essential Oils:

  1. Inhale from your hands – Add a drop of oil into your palm, rub your hands together, and cup them over your nose. You might want to close your eyes to get in the mood (or to stop the Peppermint air from making your eyes water!). Take a few deep breaths, this is a great mood shifter! You can use any oil or blend this way.
  2. Inside your wrists – Such an easy spot to apply oils. Pull up your sleeves and get rolling. The skin here is thinner and oils are absorbed well. Plus the wrists connect to the lung, heart, and pericardium channels – a place where we hold emotion.
  3. Back of the neck or spine – right to the brain! If you need a little bit of mental clarity or focus, try applying your oils on the back of your neck all the way up to your skull, or down your spine. *If you are using oils on your little ones, the spine is a great place. This is a great place to apply your immune system supportive oils, too.
  4. Bottoms of the feet – oils absorb easily into the skin on our feet, and you can hit all kinds of great reflexology points in the feet. This is a great location when you need calmness and grounding. I also suggest applying oils to the bottoms of your feet when you are using an oil that you may not love the aroma of. Want to use Oregano but don’t want to smell like a classic Italian restaurant? Bottoms of the feet, my friend, thank me later 😉
  5. Inside your elbow creases – this is a great space for emotional well-being. The elbow creases are an entry point that lead to the chest and the heart, where we hold a lot of our emotions like sadness and grief. I like to think of my arms as straws, and my chest drinks up the oils I have applied to my elbow creases.
  6. Up and down your forearms – I joke that I put my oils on and then I rub my arms together like a grasshopper – and that’s exactly what I do. Look at your forearms. You can probably see veins. Applying oils over your forearms allows the oils to absorb into your skin, and enter the bloodstream quickly. If you need to shift your emotional state quickly, apply to your forearms and your oils will get to work in a hot minute.
  7. Over your heart area – oh, my heart! This might be my favourite place to apply oils. You may look like you’re adjusting your bra when you do this around people, but you just have to explain that you’re putting oils on yourself and nine times out of ten they’ll ask you what it is and if they can smell it … from the bottle, not your chest, ’cause that might get weird. Why apply oils over your heart (chest)? It’s a wonderful place to work through stress and anxious feelings, during times of heartache and disappointment, and you can always poke your nose into your shirt to inhale that lingering aroma (t-shirt tent!).
  8. Around your belly button – not only for digestion, although it works great for that. Emotionally, the belly button is a great place to apply oils when you need extra energetic protection or when you need to set boundaries. Think of the belly button like a shield, and surround with oils as needed.
  9. Up and down the midline of the belly – oils go here when you need a self-confidence boost, or a self-worth boost. Your belly has a ton of serotonin receptors, responsible for creating feelings of happiness and self-esteem. I’m sure you’ve heard how “everything regulates in our gut.” Maybe you have never thought to apply oils here, I encourage you to try this spot because it’s actually very effective.

Enjoy the process of figuring out your oils, we’re all a little bit different with our wants and needs, and it takes a bit of experimentation.

-Laura

I’m a big fan of the elbow creases, inner wrists, and the heart area myself.

Interested in more recipes, ideas, and tips for using essential oils?

I’m on Instagram here.

I’m on Pinterest here.

The Blue Tansy Anti-aging Connection

If it keeps my skin youthful and glowy, you better bet it’s going into my skincare routine.

I’m totally on a quest to stay forever young when it comes to my face, and I want to do it naturally. A few years ago, there was a big trend with beauty companies introducing products containing Blue Tansy. It seemed kind of gimmicky and all of the products were this neat blue colour, and rather pricy.

Well, it turns out that I have a bottle of Blue Tansy essential oil – so what can I do to harness the anti-aging properties of this oil, and can I do it less expensively than Sephora?

Spoiler alert: yes I can.

Turns out blue tansy is actually very blue.

Wait… so why use Blue Tansy on your skin?

  • It’s calming, soothing, and anti-inflammatory to the skin.
  • It’s packed full of antioxidants, which are key in maintaining youthful skin.

Blue Tansy oil is distilled from Moroccan Chamomile flowers. The flowers are actually yellow, but during the distillation process, a reaction occurs, and a compound called chamazulene emerges. This chamazulene (no, I didn’t make this word up) is an inky blue colour, putting the blue in Blue Tansy.

Let’s get to the good stuff, the:

Blue Tansy Skin Serum Recipe

  • A 2oz glass bottle (dropper top, pump top, spray top)
  • 10 drops Blue Tansy essential oil (I suggest this one)
  • 10 drops Copaiba essential oil
  • Jojoba oil

Add the essential oils to the bottle first, and then top it up with jojoba oil. If you prefer another carrier oil, go right ahead. Maybe you have other essential oils that love … there are no rules here.

I like to apply this serum once a week before I go to bed. Blue Tansy has a calming aroma that helps me get in the sleep zone. I also like to change up the oils I use on my skin, just to keep it fresh and guessing.

Note: Blue Tansy is an inky blue oil, and you might find that your face turns blue when you apply this serum. So maybe don’t apply it two minutes before you head out on a hot date mmmkay?

Wishing you glowy gorgeous skin,

Laura

Let’s Start a Blog!

Hey there, I’m Laura, and I’m the creator of everything here.

I wanted a hub where I could share all of my oily DIYs, and the idea of owning my own space on the internet where I make my own rules was kind of appealing. I don’t like being told what to do. #rebel

What will you find here?

  • Essential oil education, how to use your oils, and sweet DIYs to make.
  • Lifestyle posts about my wild children, motherhood, and creating my own 9-5.

I’m sure this will evolve as time goes on. I appreciate you stopping by!

Now let’s start a blog…

Laura